Table of contents
Just Docker
The Docker extension by Microsoft available at https://marketplace.visualstudio.com/items?itemName=ms-azuretools.vscode-docker allows us to easily manage and run images. It has many more features that are beyond the scope of this article.
Its most important features are:
The following functions are most interesting for starting a new container from an image:
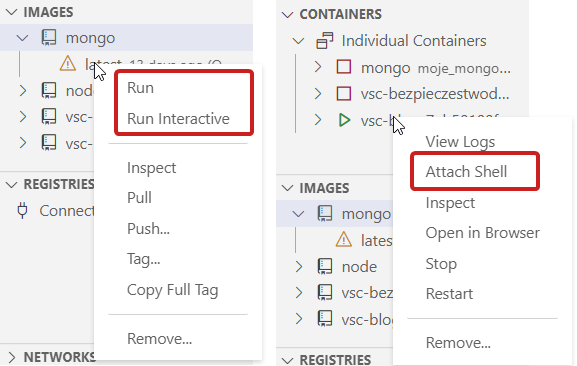
- Run
-
This is the equivalent of running the service from the previous part of the article. It starts the given container and leaves it in the background.
- Run interactive
-
Corresponds to running an interactive image. After using this command, all output and the ability to interact with the image is available from the Visual Studio Code terminal.
- Pull
-
Allows us to update the image if a newer version has appeared under the given tag.
- Remove
-
Removes the image, freeing up disk space.
For operations on a running container, the most interesting features are:
- Attach Shell
-
Connects the Visual Studio Code terminal allowing us to act in the selected container.
- Open in Browser
-
Opens the container in a browser (if the browser has provided a port for this)
- Stop
-
Stops the container.
In summary - we have all the basic operations as in the console but in a much more pleasant environment.
Remote - Containers

This is undoubtedly the best plugin to work with Docker that integrates with the plugin above, well:
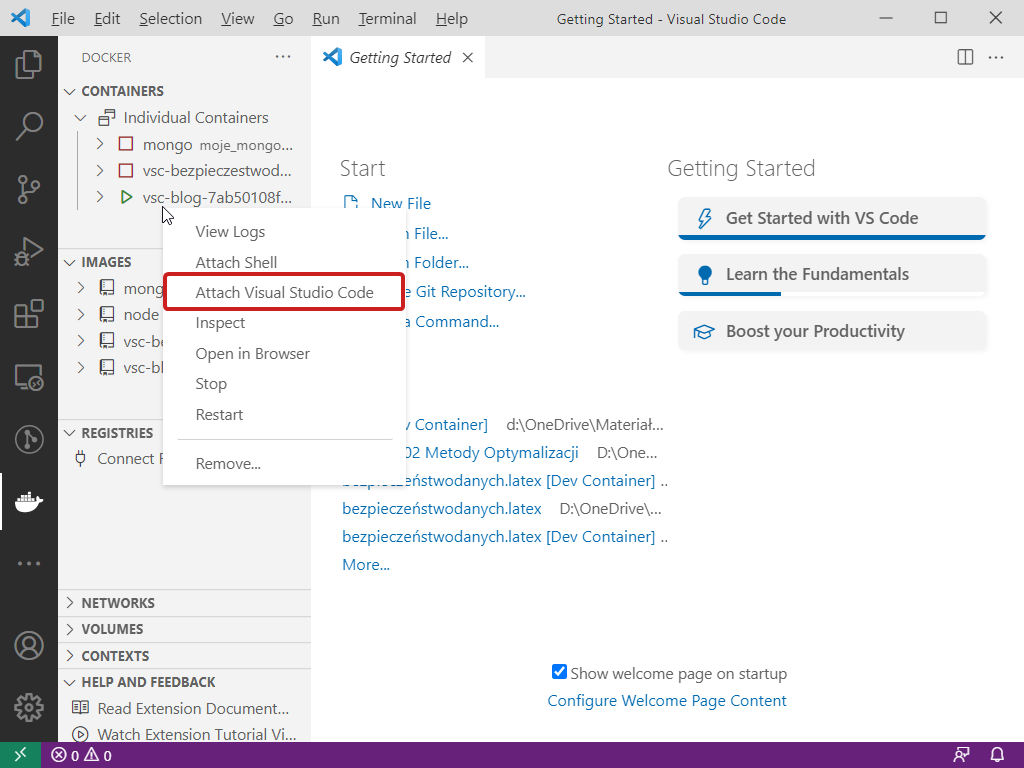
- Attach Visual Studio Code
-
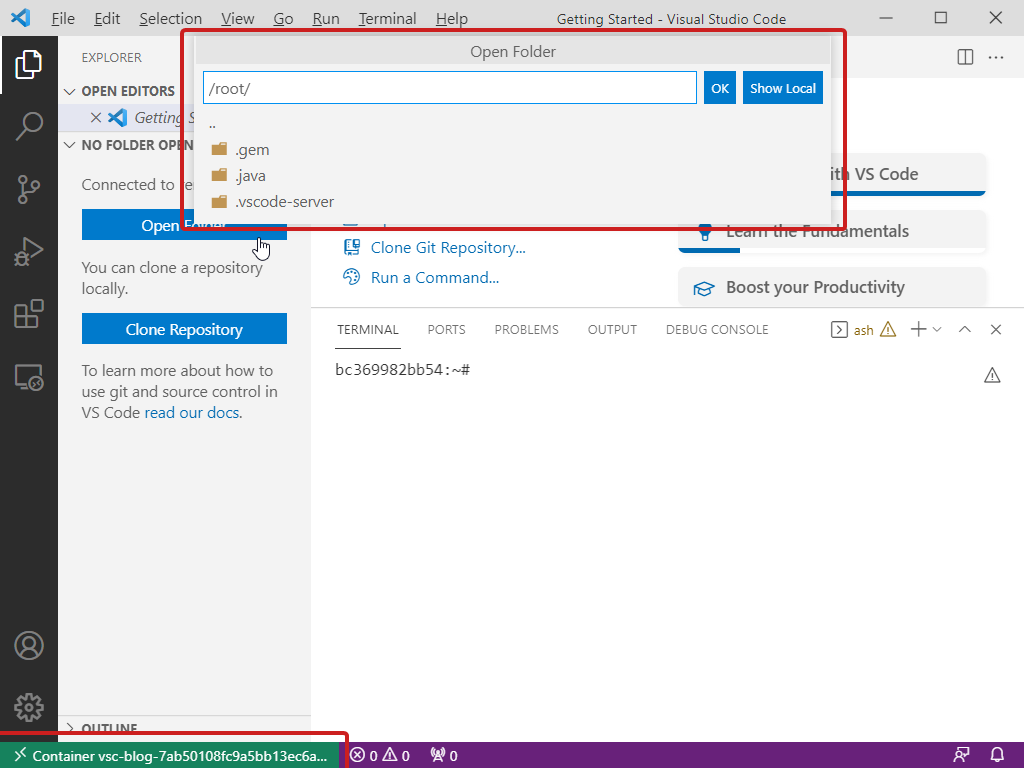
This function causes our Visual Studio Code to be reopened in the context of the container! This gives us the ability to open folders that are located there. This gives us great integration as we can easily copy data and work on files from within Visual Studio Code.
- There is an even better part of this extension, that is
-
=== .devcontainer
Visual Studio Code can run in a containerized environment (run the project in Docker) by adding a .devcontainer directory and in it a devcontainer.json file used to configure the VSC environment and a Dockerfile that stores information about our image in which we will be working.
VSC can complete the file structure for you through the command Remote-Containers: Add Development Container Configuration Files, so you don’t have to save or remember anything.
The directory structure and file contents are as follows:

-
a view of the directory structure,
-
The contents of the Dockerfile for the environment in which I write posts for this blog,
-
the contents of devcontainer.json, which automatically configures this environment on first startup.
-
a terminal and the ability to open ports while running in a container!
node.js example
-
To begin, create a directory to work in
This can be
D:/mynodejsproject, for example. You can do this using the command:> mkdir D:/mynodejsproject
Then open Visual Studio Code: in it: To do this, right-click on an empty space in the menu directory:PPM[Open With Code]. You can also do this with the command line:
+
> cd D:/mynodejsproject
> code .- Utwórz przykładowy Devcontainer
-
Inside Visual Studio Code, press F1 and type
Remote-Container: Reopen in container- this command will open a menu for selecting a sample container, from which selectNode.js, version any (I chose 16). It will take a while for the image to be downloaded and run. In the meantime, you can see that in ourD:/mynodejsprojectdirectory, a folder has appeared-
.devcontainerand in it two files (mentioned above):-
devcontainer.json, which tells us the container configuration that will be performed by VSC. -
Dockerfile, which is a classic Docker file, about which more in the official documentation: https://docs.docker.com/engine/reference/builder/.
-
-
- In the
D:/mynodejsprojectdirectory, create anapp.jsfile -
You can also do this from within Visual Studio Code. Paste the code from the previous section into it, which I also include below:
Code from Getting Started with Node.jsconst http = require('http'); const http = require('http'); const hostname = '127.0.0.1'; const port = 3000; const server = http.createServer((req, res) => { res.statusCode = 200; res.setHeader('Content-Type', 'text/plain'); res.end('Hello World'); }); server.listen(port, /*hostname,*/ () => { console.log(`Server running at http://${hostname}:${port}/`); });*Don’t forget to save the contents of the file!
- Open Terminal in Visual Studio Code
-
Go to on the top bar of VSC or press F1 and type
Open new external terminal. You will probably see something similar:node ➜ /workspaces/mynodejsproject $Well, we are inside a container, in a directory that is named identically to ours! What’s more, if we type the
lscommand, we can see that ourapp.jsfile is there!node ➜ /workspaces/mynodejsproject $ ls app.js - Let’s run our application: type the command
node app.jsin terminal -
Visual Studio automatically detects that we need port 3000 and redirects it to our computer itself! This is told to us by the message:
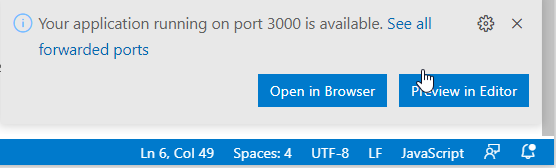
Moreover, we can click the Open in browser button, and we will see the awaited
Hello worldin our favorite browser! - Keep playing!
-
You can install a separate set of add-ons in the container, also why not add support for JavaScript or node itself?